
Compare your loaf tin before starting
The recipe uses a nine-hundred-gram loaf tin, but manufacturer dimensions can vary even when products use the same general capacity label. A very narrow deep tin can create a thicker center than a wider one, affecting baking time and the balance between browned edges and a cooked middle. Line the tin as directed and preheat the oven before mixing. Keep the paper reasonably flat so it does not trap a deep crease in the batter. Have a cooling rack ready because the method includes an initial rest in the tin followed by full cooling outside it. Choosing and preparing the tin at the beginning prevents the mixed batter from waiting while you search for a suitable container.
Use yogurt with a predictable consistency
Plain yogurt contributes moisture and acidity without an added fruit flavor. A very thick strained yogurt differs from a much thinner plain yogurt, so changing the product may influence batter consistency. Begin with the stated quantity and record the yogurt used if you want to compare results. Sweetened or flavored yogurt introduces a different sugar and flavor balance, while a plant-based alternative can have a different ingredient composition and baking behavior. These are variations rather than guaranteed identical substitutes. Keep the yogurt refrigerated until preparation and use clean utensils. The recipe contains dairy and eggs as written; replacing the yogurt alone does not make the loaf free from all animal ingredients or eliminate the egg allergen.
Prepare the lemon before mixing the wet ingredients
Wash the lemon before zesting and grate only the colored outer layer, avoiding a thick scraping of white pith. Divide the juice according to the method: part enters the batter and the remainder is used in the icing. Measure those portions because lemons vary in size and juice yield. This separation avoids using all the juice in the batter and then needing an unplanned amount for the topping. Remove seeds and keep the zest ready beside the wet ingredients. Lemon zest supplies aroma, while the juice adds liquid and acidity. Adding more of one does not reproduce the exact role of the other, so start with the written amounts before considering a stronger citrus variation.
Combine dry and wet mixtures separately
Mix flour, baking powder and salt in one bowl so the rising ingredient is distributed before the wet mixture arrives. In another bowl, whisk the sugar, eggs, yogurt, oil, zest and the specified batter portion of juice. The wet mixture should be even rather than showing isolated pools of oil or thick yogurt clumps. Preparing the two mixtures separately makes the final folding stage shorter and more controlled. Use bowls large enough to scrape the bottom without spilling. If the baking powder is old or stored poorly, it may not perform as expected, so check the package and storage instructions before blaming the oven for a loaf that fails to rise.
Fold without repeatedly beating the batter
Bring the wet ingredients into the dry mixture and fold just until combined. Scrape along the bottom and sides to include hidden flour, then stop once no dry streaks remain. Beating for a long period after the flour is wet can change the texture. A few small irregularities in the batter are less concerning than a large dry pocket, but neither requires adding extra oil or juice automatically. Pour into the prepared tin and smooth the surface into an even layer. Keep the tin level when moving it. This is a loaf batter rather than a kneaded dough, so the aim is gentle, complete incorporation and a consistent depth for baking.
Check the center and protect the surface if needed
Use the stated oven time as a starting guide, then insert a skewer into a representative central area. The method asks for a clean result, which differs from the moist-crumb check used for some brownies. The top may brown before the deepest part has finished, especially in a narrow tin or a hot oven position. If that happens, cover loosely with suitable foil and continue checking rather than removing the loaf solely because the surface looks attractive. Do not press foil tightly into the wet batter. If the center remains persistently undercooked, review tin size, ingredient measurements and oven temperature. A dark exterior is not proof that the entire loaf has reached the intended finish.
Respect both cooling stages
The initial rest in the tin helps the loaf settle before it is moved, while the later rack cooling allows air around it. Removing it immediately can damage a still-fragile structure, and leaving it in the tin indefinitely can trap moisture around the base. Use the paper carefully when lifting and place the loaf on the rack. Wait until it is fully cool before icing so the topping does not simply run off the hot surface. A warm slice may be tempting, but cutting too early can make the crumb look compressed or gummy and make it harder to assess the bake. Give the finished loaf the cooling time described rather than treating it as an optional decorative step.
Adjust icing consistency in small increments
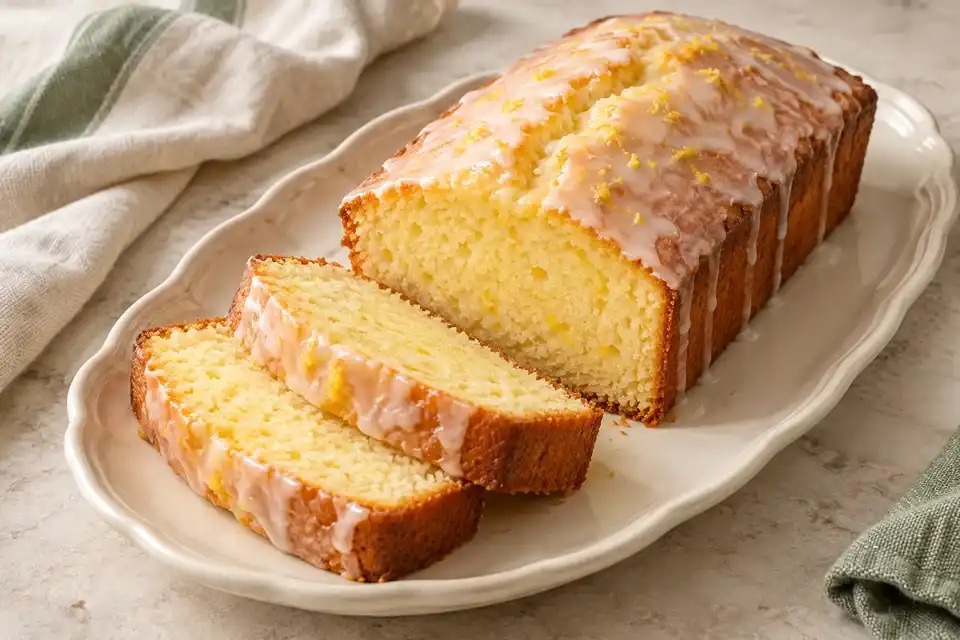
Mix the icing sugar with the reserved lemon juice, then inspect how it falls from the spoon. The method's drizzle should be controllable rather than an extremely watery pour. Different icing sugars can behave slightly differently, and an accidental large splash of juice can loosen the mixture rapidly. Add adjustments in small increments and stir thoroughly before deciding on more. Apply the icing to the cooled loaf on a suitable plate or rack arrangement that catches drips. Icing provides a sweet citrus finish, but it should not be used to hide an underbaked center or damaged loaf. If you prefer less topping, apply a smaller amount while leaving the baked formula itself intact for a useful comparison.
Plan slicing, storage and dietary changes separately
Use a sharp knife to slice the cooled loaf and keep the remaining portion covered according to the storage guidance below. Individual slices can be easier to portion for later meals than repeatedly handling the whole loaf. Replacing flour, eggs, yogurt or sugar changes a different part of the structure, so necessary dietary adaptations are better supported by a recipe designed for them or a deliberately evaluated trial. A glaze without dairy does not make the loaf dairy-free if yogurt remains in the batter. Check every packaged ingredient and cross-contact concern for someone with an allergy. For future attempts, note the tin, yogurt type and actual doneness checks so adjustments address a specific result rather than a general impression.